Steampunk Primalist

Primal Goodness

It was honestly a sheer miracle that I made it through yesterday.  As the day went on, it felt like my estimate of three hours of sleep was a bit too high.  Luckily around 3 pm I managed to catch a second wind which made the whole “driving home” thing significantly safer for everyone on the road.  My general goal was to stay awake long enough to be able to head to bed naturally around 9 pm thinking that maybe just maybe it would fix the problems and give me a good nights sleep.  For the most part it seems to have worked and while I am a bit groggier than normal this morning, I am feeling significantly “better”.  In my stupor yesterday however I managed to have an insane bit of luck.  I happened to be watching my twitter feed at just the right moment, when Rift tweeted that they were just about to give out some Wilds Packs.  They posted a photo with I believe six different codes on it, and I picked the smallest one… and started typing.  Apparently my fingers were fast enough because much to my shock I saw a note in my transaction history that said the Wilds Pack was added to my account.  Also much to my shock… I thought this was the basic pack that just included the new primalist class only, but instead it was apparently the $100 pack that includes a ton of other goodies as well including an insane dinosaur mount.

Steampunk Primalist

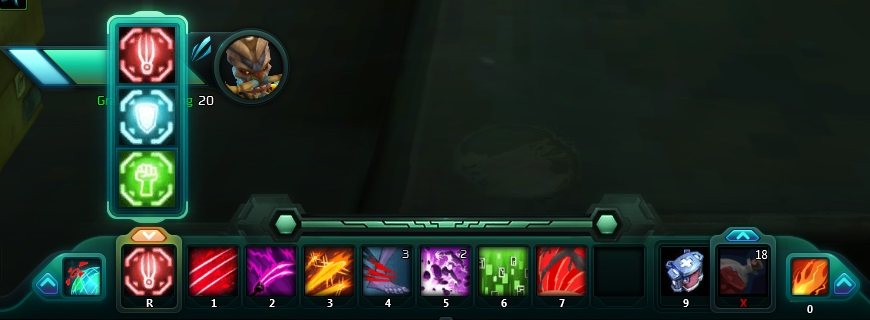
I think maybe that I violated the intentions of the class when it came to outfitting him.  I rolled a dwarf, thinking that a dwarf with a big hammer/axe/thing would be kind amazing.  Then when it came to actually setting up the wardrobe and picking a mount to use…  things happened.  Now I have my goggle wearing, leather clad, aetherbiker Dwarven Primalist.  I played a little bit but very quickly realized that maybe when I am half awake is not the best possible time to play anything that requires a significant amount of reading.  I did play enough to decide upon the Berserker prebuilt class for the time being.  I considered going Titan which was the tanky build listed, but for the time being I think I am just going to be a pewpew hammer swinging dps.  The starter primalist weapon looks kinda amazing, and honestly one of the big things that I look forward about playing him is that I will actually collect all of the low level gear appearances as I get stuff to drop for me.  That was the negative about going into a major change like the wardrobe system with a high level character…  that ultimately I was well past the gearing phase and all that I would end up physically seeing was new gear.  Playing a low level character again will see me coming across all of that gear that I had and sold, or at least that is the hopes.  However this is a journey for another day, one when I am not struggling to exist.

Questing Guardian

Steampunk Primalist

One of the negatives about playing Destiny as primarily an MMO player is that there are certain traits that carry over into the MMOFPS title.  Namely that you actually find yourself caring about having quests hanging around in your quest log.  Since the whole reading and making sense of things part of my brain was largely malfunctioning, I thought I would instead venture into Destiny and work one some of the things that have been looming over my head.  Namely the “High-Value Targets” quest.  On paper it sounds simple enough, that you need to defeat several of these High-Value targets… 3 in the Cosmodrome, 3 on the Moon, 3 on Venus, 3 on Mars, and 3 on the Dreadnaught.  The problem being that in order to qualify as a high-value target, it has to be one of those special patrol missions that ask you to go kill a given mob somewhere in the patrol zone that is marked with a red star.  To make matters more interesting… I learned that these only come from special patrol beacons that are also marked with a star.  Theses seem to be largely rare and absolute luck of the draw if you will see them.  So as a result I managed to complete the Cosmodrome and Dreadnaught quickly…  but struggled with having not found a single high value target patrol on Venus or Mars.

Steampunk Primalist

So last night I spent pretty much the entire night wandering around various planets looking for star beacons, and when I did not find them… running as many patrols as I could in the hopes of making them spawn.  At about 9:30 last night, moments before we were heading to bed…  I managed to complete the quest.  Additionally I also managed to complete Taken Assault: Mars which gave me enough Queen’s Wrath faction to finally start opening up bounties on the Reef.  This also opened up The Wolves of Mars quest chain for Variks which involves doing a bunch of shit involving the Fallen.  From what I have heard this will reward a Boolean Gemini at the end of it… which in truth will probably be a Year One variant…  but if it works like Last Word did, it also opened up the Year Two blueprint for me.  So in theory I can save up my marks and purchase the 280 version as well.  In any case I had a lot of fun last night faffing about working through the various quests and bounties.  There is something relaxing and mindless about wandering around and taking things out with an assortment of really fun to use weapons.  The other big progress I made is I collected enough data using a shotgun, so I am now on the step where I need to disassemble a bunch of blue or better ones.  I had a handful stowed away just for this occasion but it was nowhere near enough.  As a result I will be farming engrams in the hopes of getting more, and in theory I need to just start running strikes.  I did however manage to make it to 287 light when wearing my “best” gear, which is slow but palpable progress.

Mystara Monday: Module X1 – The Isle of Dread

It's time to explore one of the most famous D&D adventure modules of all time, and very likely the single most played adventure module ever, Module X1: The Isle of Dread.


Mystara Monday: Module X1 - The Isle of Dread

Originally published in 1981, The Isle of Dread was included in every Expert Rules boxed set as an introductory wilderness adventure. The copy I have is the second version, revised to match up with the Mentzer revision of the Expert Rules. Mostly this involves a number of monsters being replaced due to being left out of the new rules (giant squids were replaced with water termites, a sea dragon with a hydra, and so forth.)

At its core, The Isle of Dread is an adventure inspired by Skull Island from King Kong. The party come into possession of pages from a ship's log describing the discovery of a mysterious island, the natives of which live on a small peninsula separated from the main island by a massive protective wall. The natives claim an ancient city in the center of the island holds great treasure, and the adventure assumes the lure of both exploration and profit will be enough to get the players hooked (a reasonable assumption.)

Mystara Monday: Module X1 - The Isle of Dread
I suspect every D&D player above a certain age
recognizes this map.

On reaching the island the party finds an island of jungles and hills populated primarily by giant animals and dinosaurs (no giant apes, however.) The adventure itself consists of exploring the island, fighting monsters for their treasure, and ultimately reaching the island's central plateau where a temple ruin provides a short dungeon delve. It's less about the individual encounters on the island and more about the overall feel of exploration in uncharted wilderness far from civilization.

The Isle of Dread is also the adventure module that first provides a map of Mystara (though it's not called that yet, the map is simply of 'The Continent') and details each of the major countries shown on the map. One full page at the front of the adventure consists of a paragraph or two for each country, and is where things are established such as Glantri being a magocracy, Darokin's status as a merchant republic, or the Heldann Freeholds' resemblance to ancient Ireland. All of this information would be expanded on in later adventures and in the Gazetteers, but this is where it all started.

Mystara Monday: Module X1 - The Isle of Dread
It's not even the Known World yet at this point.

A number of important creatures are introduced in this module as well, including nearly a dozen dinosaurs and other prehistoric creatures, including giant ground sloths and giant elk. There's a definite 'land that time forgot' feel to the whole thing. Also, a few new sentient races make their debut here, such as the aranea (giant spell-casting spiders), the phanaton (halfling-sized racoon / flying squirrel people), and the kopru (evil amphibious beings with mind control powers). This is also where the rakasta, a race of cat people, first appear; they go on to become an important race in Mystara, with other rakasta tribes showing up elsewhere in the world, as well as on the moon. Not the one you can see, the invisible moon. The moon rakasta ride flying sabertooth tigers and are patterned on feudal Japan. Rakasta are awesome, is what I'm saying.

I'm pretty sure this is the adventure I've run more than any other over the years; I can think of at least four separate campaigns that have visited it. I actually made a point of not using The Isle of Dread at level in one campaign since I knew many of the players had experienced it already. Instead I planned to have the party visit it much later, well after it had been discovered and explored by others. In more than one campaign players have planned to claim the island and make it their domain once their characters were high enough level and sufficiently wealthy to build strongholds.

Next week we'll move on to Module X2: Castle Amber, one of the weirdest adventure modules you'll ever see, and another that turns out be important to the development of Mystara. Also, part of it is set in France.

New to Nexus 2: Combat, Abilities and You!

In part 2 of my quickstart guide to WildStar I want to talk more in-depth about combat, abilities, and AMPs.

Interrupts and Interrupt Armor

New to Nexus 2: Combat, Abilities and You!

An enemy with 2 interrupt armor.

One of the core features of combat in WildStar is the interrupt system. By stopping an enemy’s cast, not only do you avoid whatever bad thing they were trying to do to you, but you also create a brief moment of opportunity during which they will take extra damage from your attacks. The game signals this by changing the color of their health bar, and showing a countdown overlay to indicate the duration of their vulnerability. Taking advantage of this while questing will help you kill big enemies faster, and give you practice with the system.

New to Nexus 2: Combat, Abilities and You!

On the left, both interrupt armor have been destroyed but the enemy has not yet been interrupted. On the right, a third interrupt has been cast and the enemy is vulnerable.

Dungeons and raids make interrupting a requirement, either because the boss abilities are devastating, or because you need the damage bonus to kill things before the enrage timer. Boss mobs and some strong or elite mobs in the world also add a twist to the interrupt mechanics: interrupt armor. Interrupt armor shows up as a shield with a number in it, to the right side of an enemy’s health bar. That is the number of interrupts that need to be applied before an actual interrupt can go through. For example, if an enemy has 2 interrupt armor that means you need a total of 3 interrupts to actually stop it from casting. The first 2 break the armor, and the last one  stops the cast. What this means in practice is that in group content, everyone usually brings at least one interrupt on their bars and will have to coordinate to break the interrupt armor.

New to Nexus 2: Combat, Abilities and You!

The default nameplates are on the left. On the right I’m using the addon Optiplates, which can make tracking interrupt armor easier.

A few more notes on interrupt armor. There’s a great addon called Interruptor that will show a small bar when an enemy is casting that indicates how many interrupt armor are remaining. It is very useful for group content when you’ll need to coordinate 3 or more interrupts. Also sometimes an enemy will have infinite interrupt armor. That means they can’t be interrupted at all. The number of interrupt armor can also change during a fight, and a good rule of thumb is if the number of interrupt armor suddenly gets a lot lower, it is probably a signal that you will need to interrupt something important soon!

Innate Abilities

New to Nexus 2: Combat, Abilities and You!

My stalker’s action bar, showing my expanded innate ability choices.

Each class has a special ability that is always available on their action bars (default “R”), their “innate” ability. These define the overall flavor and functionality of each class, and are important to maximizing your potential. When I first started my spellslinger, I had no idea what I was supposed to do with this ability and ignored it for several levels, all while struggling to kill things quickly enough. Don’t be like me! Read the tooltip of your innate ability and get in the habit of using it! Some general information for each class:

Spellslinger: Spell surge buffs the damage and healing of many of your abilities. It uses spell power to activate, and using surged abilities continues to deplete your spell power. Use it often, it is a big damage/healing boost!

Medic: Energize buffs shield healing. Using it replenishes your actuators and gives a situational bonus depending on your current health. Since the assault and support power buff is only given if you are above 30% health, be mindful of your health bar when you use this ability!

Stalker: You get your choice of 3 nano skins which give passive buffs. Activating any of them will activate your stealth mode. The lethal skin buffs your crit chance and damage done after exiting stealth. The evasive skin is your tanking skin, which gives defensive and threat buffs. The agile skin gives movement, dash, and lifesteal bonuses, and has a faster movement speed while stealthed.

Engineer: You get to choose between 2 combat modes for your innate. Provoke is your tank mode, which gives passive threat and defensive buffs. Activating it gives a defensive cooldown and a volatility boost. Eradicate mode is your damage mode. Activating it will give volatility regeneration and  do some extra aoe damage.

Warrior: You get your choice of 2 stances (select one by clicking the small arrow on top of your innate on the action bar). Juggernaut is your tank stance, which gives passive threat and defensive buffs. Activating it gives an additional defensive cooldown and threat boost. Onslaught is your dps stance. Activating it resets many of your cooldowns and increases your damage output.

Esper: You have a straightforward cooldown button. Spectral form gives you a defensive bonus (absorb shield  and interrupt armor) paired with boosted psi point generation.

The LAS

You might have heard people talking about this LAS thing, or seen an endgame class guide that mentioned it. But what is it? LAS stands for “Limited Action Set”, and it is shorthand to refer to your “build” (default “B” to open) or ability choices. WildStar limits you to 8 abilities at a time. Once you’ve learned more than that, you’ll have to start making choices about which ones to use and which to ignore. The game tries to give some guidance by splitting abilities into 3 categories, Assault (damage), Support (healing or tanking), and Utility (movement abilities, interrupts, buffs etc.).

New to Nexus 2: Combat, Abilities and You!

My spellslinger’s LAS. Mouseover the bars to see what bonuses you get for tier 4 and tier 8 for each ability.

For questing, you are going to want to focus on mainly damaging abilities, with some utility sprinkled in. I like to keep at least one interrupt and one movement ability on my bars while out in the world. Depending on your play style you might want to throw a heal on your bars in addition to or instead of the movement ability.

You might have noticed that your abilities on your action bar are locked. You can assign them to different positions from the LAS menu. To remove an ability from your bar completely, click the small arrow just to the right of the ability’s icon on the list.

As you level, you gain ability  points that can be spent to increase the power of your abilities. This is what the rows next to each ability icon on the LAS menu are for. At low levels, it makes sense to assign points to the abilities you use the most or that give the biggest damage boost. Once you reach level 25 you can start spending extra ability points to unlock a special boost. These, indicated by the wider bars at tier 4 and tier 8, usually change the way the ability works in some way. Often they give some synergy with another ability, so be sure to read the tooltips so you get the most out of those bonuses!

AMPs

AMPs are WildStar’s answer to talent trees. Happily, the days where you needed to purchase or find individual AMP unlocks are a thing of the past. Unfortunately, that means you have an awful lot of choices to think about while you’re still learning the game. AMPs are located on a secondary tab on the LAS menu (“B”).

New to Nexus 2: Combat, Abilities and You!

My engineer’s AMPs. You can see she’s focused on assault abilities, with some hybrid support.

Individual AMP choices are too class-specific to cover here, but there are some basic rules of thumb. The AMP wheel is divided into 6 parts. Three of them represent assault, support and utility, while the wedges in-betwen are, well, in-between (damage/support, damage/utility, support/utility). When you are starting out it is fairly safe to stick to the wedge that represents your main role to begin with. The utility wedge is where PvP-centric AMPs can be found.

You start adding AMP points from the innermost ring and work your way out, unlocking tiers 2 and 3 by spending points within that wedge. Tier 1 AMPs are just static boosts to specific stats, which cost 1 AMP point each. Tier 2 contains AMPs that start modifying your abilities or adding situational bonuses. These  cost 4 points each. Finally, tier 3 AMPs are either powerful boosts, or unlock abilities for your LAS. Abilities cost 2 points, the rest of the AMPs in tier 3 cost 6 points. Note that if you unlock an ability via AMPs you will need to confirm your AMP choices before you can add the ability to your action bar.

While you are leveling, you can choose AMPs that look interesting to you or give bonuses to abilities that you use frequently. Once you get close to level 50, I recommend checking the class forums and taking a look at some of the endgame builds that people post there. I like to have an idea of what those endgame builds look like even when I’m still low level. It lets me focus my build toward that goal, and get practice using the abilities I know I’ll be using at 50. Sometimes this can backfire though, since most of those builds are dependent on having lots of ability and AMP points to spend that you just don’t have access to before level 50.

New to Nexus 2: Combat, Abilities and You!

Notice the cost of an amp reset. It keeps getting more pricey as you level. The tiny arrows circled in pink let you swap between different saved action sets instead of buying a reset.

You can swap out abilities at any time, but to reset your AMPs once they are confirmed you will need to pay a fee that scales with your level. Luckily even at low levels you get multiple action sets, and at max level you can have up to 5. At the very least, you can keep one for PvE and one for PvP, or one for DPS and one for healing/tanking. The bottom of your LAS menu will show which set you are using, and there are small arrows to switch between available sets.

AMP and Ability Point Unlocks

You can have a total of 48 ability points and 57 AMP points, and you will not get your full amount of points simply by leveling to 50. As you play you may find items that give you additional AMP or ability points, use them! I know in particular some of these were added as path rewards. Keep an eye out for them, since they are the way you get points beyond the simple “one per level”. Once you are level 50 there are some additional ways to obtain these. AMP and ability points, as well as extra action sets can be bought from the elder gem vendor in your capital city. Points can also be earned by defeating veteran dungeons, participating in PvP, and by gaining reputation with the various end-game factions. Finally, these can sometimes randomly drop from level 50 enemies, and can be bought and sold on the commodities exchange. End-game builds assume you have all points unlocked, but this can take weeks or months of work. Don’t be ashamed to lay down some plat instead if you have it to spare and you want to speed up the process!

New to Nexus 2: Combat, Abilities and You!

The Exile elder gem vendor in Spaceport Horizon, Thayd


New to Nexus 2: Combat, Abilities and You!

New to Nexus 2: Combat, Abilities and You!

In part 2 of my quickstart guide to WildStar I want to talk more in-depth about combat, abilities, and AMPs.

Interrupts and Interrupt Armor

New to Nexus 2: Combat, Abilities and You!

An enemy with 2 interrupt armor.

One of the core features of combat in WildStar is the interrupt system. By stopping an enemy’s cast, not only do you avoid whatever bad thing they were trying to do to you, but you also create a brief moment of opportunity during which they will take extra damage from your attacks. The game signals this by changing the color of their health bar, and showing a countdown overlay to indicate the duration of their vulnerability. Taking advantage of this while questing will help you kill big enemies faster, and give you practice with the system.

New to Nexus 2: Combat, Abilities and You!

On the left, both interrupt armor have been destroyed but the enemy has not yet been interrupted. On the right, a third interrupt has been cast and the enemy is vulnerable.

Dungeons and raids make interrupting a requirement, either because the boss abilities are devastating, or because you need the damage bonus to kill things before the enrage timer. Boss mobs and some strong or elite mobs in the world also add a twist to the interrupt mechanics: interrupt armor. Interrupt armor shows up as a shield with a number in it, to the right side of an enemy’s health bar. That is the number of interrupts that need to be applied before an actual interrupt can go through. For example, if an enemy has 2 interrupt armor that means you need a total of 3 interrupts to actually stop it from casting. The first 2 break the armor, and the last one  stops the cast. What this means in practice is that in group content, everyone usually brings at least one interrupt on their bars and will have to coordinate to break the interrupt armor.

New to Nexus 2: Combat, Abilities and You!

The default nameplates are on the left. On the right I’m using the addon Optiplates, which can make tracking interrupt armor easier.

A few more notes on interrupt armor. There’s a great addon called Interruptor that will show a small bar when an enemy is casting that indicates how many interrupt armor are remaining. It is very useful for group content when you’ll need to coordinate 3 or more interrupts. Also sometimes an enemy will have infinite interrupt armor. That means they can’t be interrupted at all. The number of interrupt armor can also change during a fight, and a good rule of thumb is if the number of interrupt armor suddenly gets a lot lower, it is probably a signal that you will need to interrupt something important soon!

Innate Abilities

New to Nexus 2: Combat, Abilities and You!

My stalker’s action bar, showing my expanded innate ability choices.

Each class has a special ability that is always available on their action bars (default “R”), their “innate” ability. These define the overall flavor and functionality of each class, and are important to maximizing your potential. When I first started my spellslinger, I had no idea what I was supposed to do with this ability and ignored it for several levels, all while struggling to kill things quickly enough. Don’t be like me! Read the tooltip of your innate ability and get in the habit of using it! Some general information for each class:

Spellslinger: Spell surge buffs the damage and healing of many of your abilities. It uses spell power to activate, and using surged abilities continues to deplete your spell power. Use it often, it is a big damage/healing boost!

Medic: Energize buffs shield healing. Using it replenishes your actuators and gives a situational bonus depending on your current health. Since the assault and support power buff is only given if you are above 30% health, be mindful of your health bar when you use this ability!

Stalker: You get your choice of 3 nano skins which give passive buffs. Activating any of them will activate your stealth mode. The lethal skin buffs your crit chance and damage done after exiting stealth. The evasive skin is your tanking skin, which gives defensive and threat buffs. The agile skin gives movement, dash, and lifesteal bonuses, and has a faster movement speed while stealthed.

Engineer: You get to choose between 2 combat modes for your innate. Provoke is your tank mode, which gives passive threat and defensive buffs. Activating it gives a defensive cooldown and a volatility boost. Eradicate mode is your damage mode. Activating it will give volatility regeneration and  do some extra aoe damage.

Warrior: You get your choice of 2 stances (select one by clicking the small arrow on top of your innate on the action bar). Juggernaut is your tank stance, which gives passive threat and defensive buffs. Activating it gives an additional defensive cooldown and threat boost. Onslaught is your dps stance. Activating it resets many of your cooldowns and increases your damage output.

Esper: You have a straightforward cooldown button. Spectral form gives you a defensive bonus (absorb shield  and interrupt armor) paired with boosted psi point generation.

The LAS

You might have heard people talking about this LAS thing, or seen an endgame class guide that mentioned it. But what is it? LAS stands for “Limited Action Set”, and it is shorthand to refer to your “build” (default “B” to open) or ability choices. WildStar limits you to 8 abilities at a time. Once you’ve learned more than that, you’ll have to start making choices about which ones to use and which to ignore. The game tries to give some guidance by splitting abilities into 3 categories, Assault (damage), Support (healing or tanking), and Utility (movement abilities, interrupts, buffs etc.).

New to Nexus 2: Combat, Abilities and You!

My spellslinger’s LAS. Mouseover the bars to see what bonuses you get for tier 4 and tier 8 for each ability.

For questing, you are going to want to focus on mainly damaging abilities, with some utility sprinkled in. I like to keep at least one interrupt and one movement ability on my bars while out in the world. Depending on your play style you might want to throw a heal on your bars in addition to or instead of the movement ability.

You might have noticed that your abilities on your action bar are locked. You can assign them to different positions from the LAS menu. To remove an ability from your bar completely, click the small arrow just to the right of the ability’s icon on the list.

As you level, you gain ability  points that can be spent to increase the power of your abilities. This is what the rows next to each ability icon on the LAS menu are for. At low levels, it makes sense to assign points to the abilities you use the most or that give the biggest damage boost. Once you reach level 25 you can start spending extra ability points to unlock a special boost. These, indicated by the wider bars at tier 4 and tier 8, usually change the way the ability works in some way. Often they give some synergy with another ability, so be sure to read the tooltips so you get the most out of those bonuses!

AMPs

AMPs are WildStar’s answer to talent trees. Happily, the days where you needed to purchase or find individual AMP unlocks are a thing of the past. Unfortunately, that means you have an awful lot of choices to think about while you’re still learning the game. AMPs are located on a secondary tab on the LAS menu (“B”).

New to Nexus 2: Combat, Abilities and You!

My engineer’s AMPs. You can see she’s focused on assault abilities, with some hybrid support.

Individual AMP choices are too class-specific to cover here, but there are some basic rules of thumb. The AMP wheel is divided into 6 parts. Three of them represent assault, support and utility, while the wedges in-betwen are, well, in-between (damage/support, damage/utility, support/utility). When you are starting out it is fairly safe to stick to the wedge that represents your main role to begin with. The utility wedge is where PvP-centric AMPs can be found.

You start adding AMP points from the innermost ring and work your way out, unlocking tiers 2 and 3 by spending points within that wedge. Tier 1 AMPs are just static boosts to specific stats, which cost 1 AMP point each. Tier 2 contains AMPs that start modifying your abilities or adding situational bonuses. These  cost 4 points each. Finally, tier 3 AMPs are either powerful boosts, or unlock abilities for your LAS. Abilities cost 2 points, the rest of the AMPs in tier 3 cost 6 points. Note that if you unlock an ability via AMPs you will need to confirm your AMP choices before you can add the ability to your action bar.

While you are leveling, you can choose AMPs that look interesting to you or give bonuses to abilities that you use frequently. Once you get close to level 50, I recommend checking the class forums and taking a look at some of the endgame builds that people post there. I like to have an idea of what those endgame builds look like even when I’m still low level. It lets me focus my build toward that goal, and get practice using the abilities I know I’ll be using at 50. Sometimes this can backfire though, since most of those builds are dependent on having lots of ability and AMP points to spend that you just don’t have access to before level 50.

New to Nexus 2: Combat, Abilities and You!

Notice the cost of an amp reset. It keeps getting more pricey as you level. The tiny arrows circled in pink let you swap between different saved action sets instead of buying a reset.

You can swap out abilities at any time, but to reset your AMPs once they are confirmed you will need to pay a fee that scales with your level. Luckily even at low levels you get multiple action sets, and at max level you can have up to 5. At the very least, you can keep one for PvE and one for PvP, or one for DPS and one for healing/tanking. The bottom of your LAS menu will show which set you are using, and there are small arrows to switch between available sets.

AMP and Ability Point Unlocks

You can have a total of 48 ability points and 57 AMP points, and you will not get your full amount of points simply by leveling to 50. As you play you may find items that give you additional AMP or ability points, use them! I know in particular some of these were added as path rewards. Keep an eye out for them, since they are the way you get points beyond the simple “one per level”. Once you are level 50 there are some additional ways to obtain these. AMP and ability points, as well as extra action sets can be bought from the elder gem vendor in your capital city. Points can also be earned by defeating veteran dungeons, participating in PvP, and by gaining reputation with the various end-game factions. Finally, these can sometimes randomly drop from level 50 enemies, and can be bought and sold on the commodities exchange. End-game builds assume you have all points unlocked, but this can take weeks or months of work. Don’t be ashamed to lay down some plat instead if you have it to spare and you want to speed up the process!

New to Nexus 2: Combat, Abilities and You!

The Exile elder gem vendor in Spaceport Horizon, Thayd


New to Nexus 2: Combat, Abilities and You!